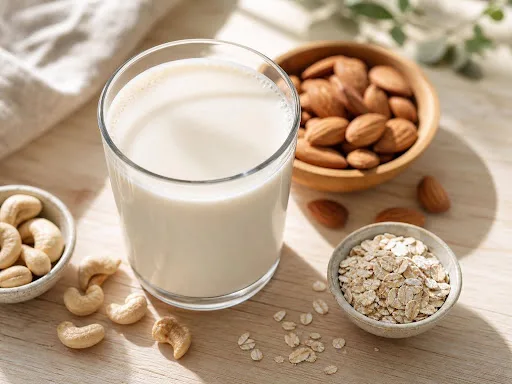
Plant-based milk has come a long way from its niche health-food origins and now sits comfortably in kitchens everywhere. Almond, oat, soy, coconut, and cashew varieties line grocery store shelves right next to dairy milk, a shift fueled by lactose intolerance, changing dietary habits, and a growing interest in sustainability. But more and more people are bypassing the store altogether and making their own—mainly to control what actually ends up in the bottle, reduce packaging waste, and dial in the taste and texture they want. There’s more than one way to do this: some cooks rely on a simple blender-and-strain method, others soak and boil ingredients like soybeans the traditional way, and some turn to a dedicated milk maker machine that handles soaking, blending, and straining in one go. No single approach is objectively better—it really comes down to habits, budget, and what fits your kitchen.
This guide covers what plant-based milk actually is, the basic steps most recipes have in common, the tools that can simplify the process, and some practical advice on flavor, texture, and storage. The idea isn’t to push any particular product, but to help you find an approach that works for you.
Understanding Plant-Based Milk
Plant-based milk is, at its core, a liquid extracted from nuts, seeds, grains, or legumes—almonds, oats, soy, coconut, and cashews being the usual suspects. Strip it down and it’s essentially water combined with finely blended plant material, sometimes strained afterward for a smoother finish. Homemade versions don’t need much: a base, water, and maybe a natural sweetener or flavoring like dates, vanilla, or a pinch of salt. Different bases lend themselves to different uses—oat milk tends to shine in coffee and cereal, while almond milk is a go-to for smoothies.
People land on making their own for a handful of recurring reasons:
- More control over additives like added sugar, stabilizers, or preservatives
- The freedom to adjust creaminess simply by changing the water-to-base ratio
- Less packaging waste over time
- Lower cost for anyone drinking plant-based milk regularly
Many home cooks say the switch happened after they compared the long ingredient list on a store-bought carton to the two or three things they use at home.
Core Methods for Making Plant-Based Milk at Home
However the base ingredient changes, most recipes boil down to the same three steps:
- Soak — Nuts and certain grains benefit from soaking, which softens them and helps them blend more smoothly. Almonds and cashews are typically soaked for four to six hours or overnight, though some recipes treat this as optional.
- Blend — The soaked ingredients go into fresh water, usually starting on low speed and working up to high for about one to two minutes, until the mixture turns smooth and milky.
- Strain (optional) — Cheesecloth, a nut milk bag, or a fine-mesh sieve removes the leftover pulp for a smoother texture. Some cashew recipes skip this step entirely, since the pulp blends finely enough to leave in.
Key takeaway: most plant-based milks follow the same soak-blend-strain pattern, with small variations depending on the ingredient. A common starting ratio is one cup of nuts to three or four cups of water, adjusted to taste.
That said, ingredients don’t all behave the same way. Oats can turn slimy if over-blended or mixed with warm water, so sticking to cold water and shorter blending times helps avoid that. Soy needs a bit more care—soaking, sometimes peeling the skins, and boiling, both for safety and to tone down its beany aftertaste. Coconut milk is usually made from shredded coconut blended with hot water, which produces a rich, higher-fat result. If you’re working with an unfamiliar ingredient, it’s worth following a tested recipe from a reliable source, especially with legumes that need proper cooking.
Tools and Appliances for DIY Plant-Based Milk
The simplest setups lean on manual tools—cheesecloth, nut milk bags, or fine-mesh strainers. They’re inexpensive, easy to clean, and require little more than some patience with the pulp cleanup. A high-speed blender tends to give smoother results in less time, and starting on a low setting before ramping up protects the motor and keeps splashing to a minimum. Food processors and immersion blenders show up in some recipes too, depending on what’s being made.
For anyone making milk on a regular basis, dedicated appliances—often labeled nut milk makers or plant milk makers—combine soaking, blending, and straining into a single automated process. The appeal is obvious: more consistency, less manual effort. The tradeoffs are just as real, though, including the upfront cost, the counter space they take up, and a bit of a learning curve. As with any kitchen appliance, it helps to weigh how often you’ll actually use it against what you’re paying, and to check independent reviews before deciding.
Optimizing Flavor, Texture, and Nutrition
The water-to-ingredient ratio is the single biggest factor in controlling texture. Roughly 1:3 makes a creamier milk that works well in coffee, while 1:4 or higher produces something lighter and easier to drink on its own. Popular flavor additions include dates, vanilla extract, cocoa, cinnamon, and a small pinch of salt—all of which boost flavor without relying on much added sugar. Unsweetened versions generally hold up better in savory cooking.
Worth trying: vanilla-almond, cinnamon-oat, and cocoa-cashew are combinations that consistently work well.
Homemade plant-based milk usually keeps for three to five days in the fridge, provided it’s stored in an airtight container. Some separation is completely normal, so give it a good shake before drinking, and toss anything that smells or looks off.
Practical Examples and Use Cases
One batch can easily carry you through coffee in the morning, cereal at breakfast, and a smoothie or sauce later on. Someone just starting out with a basic blender might try oats or almonds first; a person making milk several times a week might find it worth investing in a high-speed blender or a dedicated machine to save time; and anyone avoiding certain nuts could experiment with seeds or grains instead.
Bringing It All Together
Homemade plant-based milk doesn’t require much equipment to get started, and nearly every recipe follows the same soak-blend-strain-store rhythm. Whether you reach for a simple cloth strainer or invest in a dedicated appliance, the right choice really comes down to your time, budget, and available kitchen space. Consider picking one simple recipe to try this week, and build from there.